Feeds:
Posts
Comments

Archive for the ‘Recipes’ Category

Brussels Sprouts??

I am sure sticking my neck out but I’m just going to go ahead and confess it outright.

I HAVE NEVER, EVER, EVER, EVER EATEN BRUSSELS SPROUTS!

I can hardly believe it myself! They have always just looked and sounded so nasty that I just couldn’t bring myself to try them.  Until . . . .

I just happen to be in the vegetable section at Sprouts, and there they were in the cutest little bag. I have been trying to change my eating habits and so I thought, “why not?” So I grabbed the handy dandy handles on the bag and put them in my shopping cart.

01-IMG_7000.JPG

I brought them home and set them on my counter, and that’s where they stayed until they were almost ready to throw out. I was finally forced into cooking them.

Which I didn’t have a clue how to do.

02-IMG_7001

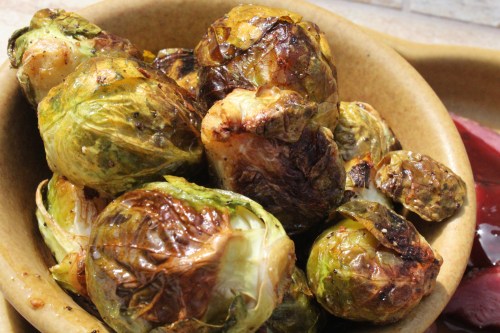
I am partial to anything roasted so I decided that would be the best way to cook them. I generally roast everything the same way.

So I coated them with olive oil, crushed a garlic clove and covered them with salt and pepper. I cooked them for about 20 minutes at 425.

04-IMG_7006

I prepared our meal and we had our dinner on the patio.

03-IMG_7003

I took one bite and I was in heaven! I couldn’t stop, I was eating them like popcorn, just popping them into my mouth. They were so surprisingly delicious!

07-IMG_7010.JPG

Where have you been all my life you wonderful little Brussels Sprouts in cute little bags?  I am now a huge Brussels Sprouts fan!
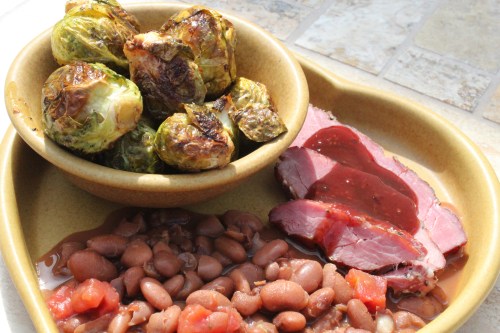
06-IMG_7008.JPG

Our menu?

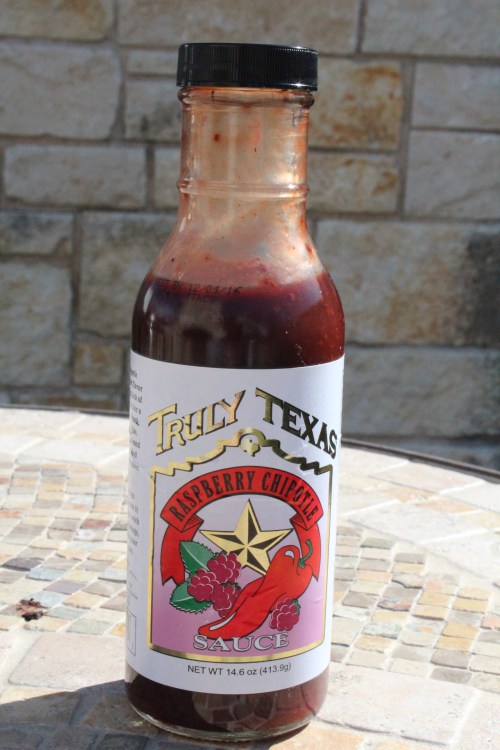
Pork tenderloin with Raspberry Chipotle sauce   (this is one amazing sauce)
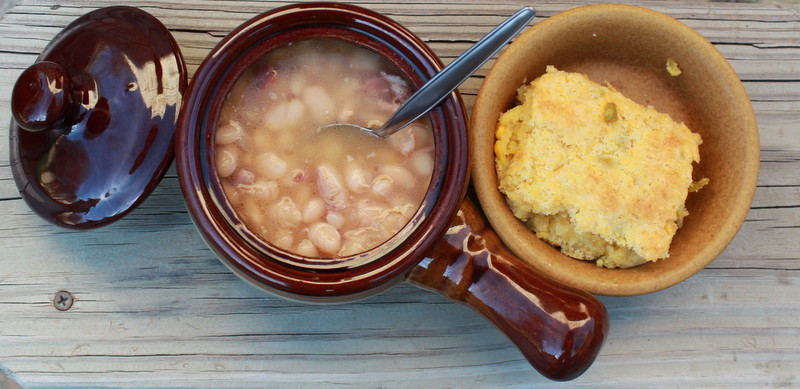
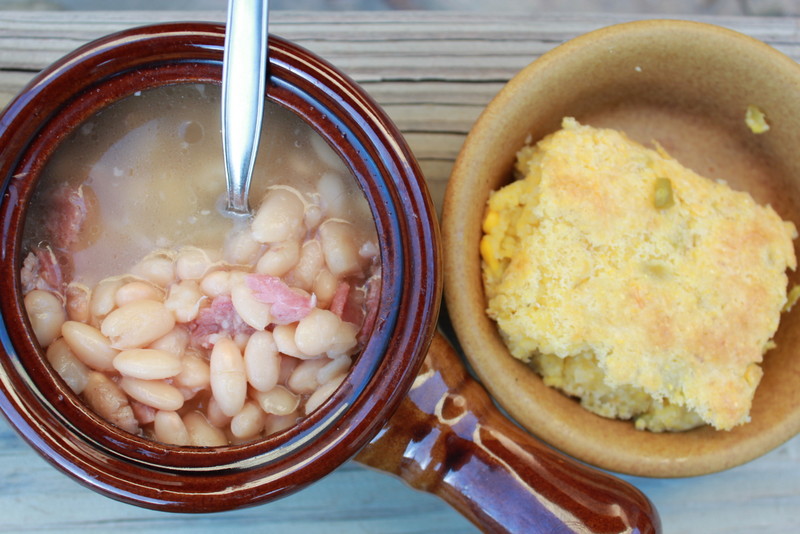
Pinto Beans

Roasted Brussels Sprouts

08-IMG_701210-IMG_7015

09-IMG_7014

Roasted Brussels Sprouts: Preheat oven to 425 degrees,  wash and dry Brussels sprouts, 3 tablespoons olive oil, 1 garlic clove, salt and pepper to taste.  Bake for about 20 minutes, shaking the pan to turn the Brussels sprouts every 5 minutes.

07-IMG_7010

So, whether you eat or drink, or whatever you do, do all to the glory of God. 1 Cor. 10:31

Read Full Post »

Apple Love

I am not sure how much more I can take, I can barely hold on. The hot Texas sun wears on me and I am suffocating from it.  My heart longs for my beloved fall and I hold on to hope that it is just around the corner. I grasp for it prematurely and create moments to bring me closer to it.

It’s almost here. . . It’s almost here . . .

It’s not quite apple time, but I seize an opportunity when Azure has apples for sale. I can not help myself and I go for it. I hear it everywhere, “It’s not time for apples.”

But I take the plunge anyway and my apples come and I spend the day with my apples.

Ginger Gold are these apples. A little different than what I am used to and everyone reminds me again, “Well, it’s just not time for apples.” But I am determined.  The Ginger Gold apples have a soft texture with a tart taste.

I started with one of my favorites, dehydrated apples. After all, my children got me a dehydrator for my birthday last year and I haven’t had the opportunity to use it.

IMG_2747

I pull out my handy dandy apple peeler, slicer, and corer. But they were too soft to peel or slice, so I settled for just coring the apples, then I sliced them by hand with a knife.

I soak them in distilled water and citric acid for a few minutes, sprinkled them with organic cinnamon and put them in the dehydrator for about 6 hours. The house smelled amazing!

IMG_2746IMG_2748IMG_2750IMG_2752

Let me just say that I love, love, love this dehydrator. Purchased at Amazon here.

The apples however is a bit of a different story. That little tart kick turned into very sour apples. The girls didn’t like it, too sour for them, but their daddy liked them.

IMG_2756IMG_2757

My next apple project was to make applesauce. I had little hope of it turning out very edible for the girls. I was sure it was going to be too sour for them, but I could not let my apples go bad.

Another wonderful gift from my kids, the Food Strainer, Sauce Maker, also purchased from Amazon here.

This is the coolest thing ever and I had so much fun using it. It was hard physically for me to put it together, my son-in-law had to do the strong arm stuff, but I did manage to take it apart alone.

IMG_2760

I cut the apples in fourths, cutting out the bad parts and bruises, put them in a pot and covered them with distilled water. I cooked them for about 20-30 minutes, then put them in a colander to drain the excess water.

IMG_2769

You simply put the apples in the top bowl and crank the handle.  Apple sauce comes out one side and all the trash-skin, seeds, core-comes out another side.

IMG_2762IMG_2766IMG_2764IMG_2772IMG_2770IMG_2768

Next I put the apple sauce back into the pot and added sugar. For the amount that I had I added 1 cup or organic sugar. I also added 1 heaping teaspoon of organic cinnamon. I cooked it until it was hot and bubbly, making sure everything was mixed together.

IMG_2777IMG_2778

l had already prepared my jars and lids by boiling them in water to sterilize them. While they were still hot I spooned the hot apple sauce into the jars filling them up almost to the top. I left about an 1/2 inch at the top.

IMG_2780

l boiled them in a water bath for about 30 minutes, then I just sat back and listened to the lids pop. A wonderful sound.

I did sample the applesauce and I was pleasantly surprised! It tasted amazing. It was not too tart after all.

IMG_2781

IMG_2786

There were a few apples left that were beginning to get some bad spots, so I cut those out and made apple crisp for supper.

Absolute apple love

IMG_2789

IMG_2791

Keep me as the apple of the eye; Hide me in the shadow of Your wings.  Psalms 17:8

Read Full Post »

Bean Soup

When my husband and I were married nearly 34 years ago he was accustomed to eating pinto beans at every meal, or at least nearly every meal. I had never had pinto beans so he introduced them to me and taught me how to cook them, and they have indeed become a favorite dish for our family.

However growing up in Michigan we always ate White Northern Beans and it was served as the whole meal with a side of corn bread and we just called it bean soup.

After all these years I still hunger for my “bean soup”, that takes me back and fills my mind and my tummy with comfort and amazing goodness. So each year after the Christmas ham has been baked and gobbled us, I swoop up the ham bone and indulge in some bean soup.

I just sort, and rinse a small bag of White Northern Beans, put them in a pot and cover them with water, then I insert the ham bone. I bring it to a boil, then cover and simmer until the beans are tender and the ham has mingled with the beans. Utter perfection!

IMG_5511

Growing up we ate just plain ole corn bread, so I found a recipe online that kicked it up a couple of notches by added cheese, corn and chiles.

IMG_5508

This has been my diet for the past couple of days and I am one happy camper. Until next year!

IMG_5560IMG_5563IMG_5565IMG_5572IMG_5577

You prepare a table before me in the presence of my enemies;
You anoint my head with oil;
My cup runs over.
Surely goodness and mercy shall follow me
All the days of my life;
And I will dwell in the house of the Lord
Forever.  Psalm 23:5-6

Read Full Post »

Pickles

My daughter and I love to watch the homesteading videos by Keeper of the Homestead. You can check them out here:

http://www.keeperofthehomestead.com/blog

IMG_2056

They are instructional videos filled with all kinds of information. There is anything from shearing sheep, processing wool, spinning it, and knitting. They teach how to put up fences to how to put up canned foods. They even teach how to process chicken, from plucking it to cutting it up. If you can imagine it, they teach it in these videos. We have watched them over and over and love them.

They have several canning recipes so I decided to try out their canned pickles.

I started with cleaning the cucumbers, washing and rinsing them thoroughly.

IMG_1932

IMG_1933

While I was cleaning the cucumbers I sterilized my canning jars and lids.IMG_1943I gathered the ingredients that I would need for the pickles.

For the brine I used:

2 qt. distilled water

1 qt apple cider vinegar

1 cup canning salts

1 cup sugar

1 teas. cream of tater

Bring to a boil and let simmer until you are ready to pour into jars.

For best results please check out their full recipe from the video.

IMG_1952

I cut up the cucumbers and stuffed them into the hot sterilized jars.

IMG_1954

On the top of the cucumbers I added 1/2 head of garlic, a bunch of dill and 1/4 teas. alum. Then I poured the hot brine into the jars, leaving about 1/2 inch at the neck of the jar. Make sure you wipe the rim of the jar with a clean cloth.

IMG_1959IMG_1962

Place the sterilized lids on top of the jar and tighten them down. I use the water bath method to seal the jars. I put them in the hot water for about 25 minutes.

IMG_1966

I am letting them set up for a week before I try them. It has been many years since I have canned pickles. It is something I used to do with my mother growing up.

IMG_1964

You have multiplied the nation and increased its joy; They rejoice before You according to the joy of harvest, As men rejoice when they divide the spoil.  Is. 9:3


Read Full Post »

Apple Day

ONCE . . . . long ago, I had the most amazing apple tree.  For years I reaped plump, delicious, succulent apples. I spent the late fall season making apple pies, apple crisp and applesauce, filling my freezer full of all things apples. 

But one spring as it began to blossom and grow tiny little apples, it took a terrible turn and died. Since then I have planted apple tree after apple tree, to no avail.  

I have two apple trees planted now, and so far they are looking good, but it will be a couple of more years before I will get any fruit. So Azure Standard will have to fulfill my apple craze for now.

And it begins.   

Image


To dehydrate the apples, I slice the apples and sprinkle them with cinnamon, then bake them at 150 degrees for around 6-8 hours, turning them every couple of hours.


ImageImage


I LOVE this little gadget!

ImageImage


This is my first year of canning applesauce. I cooked the apples, covering them with water until they were tender, then added 1/2-3/4 cup sugar and 2 tsp. cinnamon, then I pureed them in my blender.  

I made sure my jars and lids were sterilized before I put the applesauce in them. I hot water bath the jars for 30 mins. 

ImageImage


This is also the first time I made apple pie filling in a jar.  I followed the recipe from:

http://www.motherearthliving.com

I used arrow root instead of cornstarch.


ImageImageImageImage


It took a few Saturdays to finish, and actually, I am not done, but I will keep on keeping on until I am finished and every apple is put up.

ImageImage


The dehydrated apples were a big hit and I have since made a couple more batches. They are Aria’s favorite so I try to have some for her when she visits. 


ImageImageImageImageImage


And what can I say about the apple pies?  YUMMY!!

ImageImageImageImage


I am always sad when apple season is over. Hopefully there is enough to get me through til next year.

Image


And He said, “The kingdom of God is as if a man should scatter seed on the ground, and should sleep by night and rise by day, and the seed should sprout and grow, he himself does not know how. For the earth yields crops by itself: first the blade, then the head, after that the full grain in the head. But when the grain ripens, immediately he puts in the sickle, because the harvest has come.”  Mark 4:26-29

Read Full Post »

Pumpkin Seeds

And let’s not forget the pumpkin seeds.        

After pulling the seeds out and cleaning all the stringy, slimy stuff off, I washed them super good . . .                             Image

then boiled them in salt water for ten minutes.              Image

I dried them off on a paper towel–they do not have to be completely dry, but pretty dry.    Image

I put them on a cookie sheet, rubbed olive oil on them and salted them pretty good.       Image

Then into the oven, 325 for 20 minutes stirring half way through.     Image

The seeds were amazing and I loved them. I finished up the last of them today and can’t wait to make another batch! ImageImage


He answered and said to them; “He who sows the good seed is the Son of Man.”         Matt. 13:37


Read Full Post »

Canning Pumpkins

After the squash bugs got through with my garden I ended up with 7 pumpkins. Then to my dismay I had to pull the rest of the vines up because those nasty little critters had destroyed them.  

This past week Andrea and I started the process of canning the pumpkins.          Image

After gumps cut the pumpkins up, I cleaned out the seeds and stringy stuff from the inside.     

ImageImage


Into the oven it went, at 400 degrees for about 45 mins. to an hour.    ImageImage


I baked it until the flesh was soft.

Image


I scraped out all the flesh from the pumpkin and put it in a food processor to puree.  I also ran it through my blender just to get a smoother, thinner texture.


ImageImage


I pushed it through a sieve to get out all the extra juice. 


Image


Then into my jars that I had already washed and sterilized.Image


I put the lid on tightly and into the bath it goes for about 20 mins. 


ImageImage

Image


Then He said to His disciples, “The harvest truly is plentiful, but the laborers are few, therefore pray the Lord of the harvest to send out laborers into His harvest.”                Matthew 9:37-38

Read Full Post »

The Scones Disaster

Our first attempt at making scones is one I will not soon forget. Although spending time in the kitchen with Aria is one of my favorite things to do, the scone experience will be pressed deep in our memory for a long time to come.

Now, I am truly humbling myself in telling this story. It is a little embarrassing to say the least, but I am going to go ahead and put myself out there.

Pinterest is one of my favorite things, as it is with most people I know. So when I found an amazing recipe for apple cinnamon scones I was very excited, especially since I had just purchased a new scone pan and was looking for an opportunity to use it. The scones were to be served at our very anticipated tea party.

I had already reviewed the ingredients that we needed and felt pretty confident that I had everything the recipe called for, so I gathered together everything needed to make the scones.

ImageImageImage


Flour . . .  check

sugar . . .  check

spices . . .  check

apples . . .   check

eggs . . . check

applesauce . . .  check

cinnamon chips . . . check          

So we began the mixing process.     ImageImageImageImage

And finally, into the bowl went the cinnamon chips.         Image

It was smelling heavenly and we were having the best time. We worked together to accomplish this desired goal and we were feeling pretty satisfied with the results.    ImageImageImageImageImage

Into the oven went our scones and the house began to have the thick, heavy smell of cinnamon and spices. It was such an amazing aroma and we could not wait to taste the works of our hands.

Finally they were done baking and we set them out to cool.      Image

When they were ready we could not wait to sink our teeth into the awesome smelling scones.

Image

We set the table and made all the necessary preparations for our tea party.   ImageImageImageImage

Everything looked so inviting and delicious and we eagerly filled our plates and dug in!  

ImageImage


Aria took the first bite, then I heard it . . . .  crunch . . . . crunch . . . crunch!    Image

What was that?????  I took a bite of my own scone and once again . . . 

crunch . . . crunch  . . . crunch!  

Oh no!!! My mind raced back throughout the process and it hit me! It was the cinnamon chips!  What could have happened? So I found the recipe on line and looked a little closer at it. They didn’t literally mean “cinnamon chips” but instead it was cinnamon chips, you know, like chocolate chips!  I didn’t even know there was such a thing!              

However, the scones tasted amazing so we continued on with our tea party, spitting cinnamon chips out onto our plates like watermelon seeds.               ImageImageImageImageImageImageImage


The recipe truly was wonderful and we will make it again, except this time we will use the correct ingredients.  You can find the recipe here:

http://www.kingarthurflour.com/recipes/fresh-apple-cinnamon-scones-recipe

Image


And let he beauty of the Lord our God be upon us, and establish the work of our hands for us; Yes, establish the work of our hands. Psalm 90:17

Read Full Post »

Chicken and Rice

Chicken and dumplings are one my family’s favorite dishes—except Kory. He has never liked the dumplings. So in an effort to try and please everyone I began to try different approaches. 

This is what I came up with and everyone is happy with it. It makes a bunch so there is enough to share.  

This is what you will need:    Image

Boil the chicken until it is completely done, then remove the chicken and keep the broth. Image


To the broth add 1 can of mushroom soup and/or 1 can of chicken soup. If I have both I use both, but if I don’t I just use whatever I have. Add two chicken bouillon cubes and stir.   Image

Shred the chicken, Image

and add it to the pot.   Image

Next, add the chicken flavor Rice-a-Roni,   Image

and the seasoning mix.  Image

Mix well, bring to a boil and simmer until it is thick. I usually simmer for about 45 minutes to 1 hour.   

Serve with mashed potatoes.   Image

“Also in the day of your gladness, in your appointed feasts, and at the beginning of your months, you shall blow the trumpets over your burnt offerings and over the sacrifices of your peace offerings; and they shall be a memorial for you before your God: I am the Lord your God.”  Numbers 10:10

Read Full Post »

Cinnamon Rolls

I got this amazing cinnamon roll recipe from my friend Suzy.

Find the basic bread recipe here:

grinding grain    Image

Make the basic bread recipe,Image

Image

then put your dough onto the counter to knead.Image

 I like to use coconut oil to knead the dough instead of flour so that it does not get too dry.   If the dough is too sticky then use some flour.

ImageImage


After you knead the dough, flour the surface and roll it out in a rectangle shape.


ImageImage


Here is what you will need to complete the cinnamon rolls:Image

Melt about 3-4 Tablespoons of butter and spread it all over the top of the dough. 

Sprinkle cinnamon on top of the butter. O.k,I love cinnamon so I don’t sprinkle. You can use however much you like.   ImageImage

Then I sprinkle (or dump) coconut sugar on the top of the cinnamon butter.  Image

Roll the dough length ways and pinch the edges into the dough so it will not come apart.  Using a strong string, slice the dough into rolls.   Image

 Pour the maple syrup into your baking dish,   Image

along with some chopped pecans.  Image

Put your cinnamon rolls in the pan about 1 inch apart and place it on a warm stove. Cover it with a towel and let them rise for about 1 hour or until they have doubled in size.   Image

After they rise, bake them in a 350 degree oven for about 20-25 minutes. Don’t over cook.  

Image

After they are done baking, let them cool and serve.   ImageImage

And yes, I ate that one and a few more!  Image


Enough to share!


Image


The bin of flour was not used up, nor did the jar of oil run dry, according to the word of the Lord which He spoke by Elijah.  1 Kings 17:16

Read Full Post »

Older Posts »

KDD & Co

Award-winning Scottish publishing and design

Dye2Spin: Your Stash Supplier

Creating Fabulous Yarn for Your Crafting Happiness

Free to Surrender

Learning to look up and let go

Christian War Journal

Fight the Good Fight, Wage the Good Warfare

wisdom of the wolf

dressing well starts inside

Prząśniczka

blog o przędzeniu i tkaniu

focusingmygaze

This is simply a place for me to record and share with others some of the things God is teaching me and doing in my life and the lives of those around me. I pray it glorifies God and encourages others.

Buzy Day

The adventure of NikkiM

leahemilynelson

Just another WordPress.com site

The Horner Corner

A peek into the life of Will and Maisie!

%d bloggers like this: